This is a quick guide for getting started using ESP-IDF with the ESP32. Learn how to create a template on VS Code to program your ESP32 using ESP-IDF.

Prerequisites
Before following this guide, you need to install the ESP-IDF extension on VS Code IDE (Microsoft Visual Studio Code). Follow the next guide to install it, if you haven’t already:
You will also need an ESP32 development board model of your choice.
Creating an ESP-IDF Template App Project for the ESP32
The ESP-IDF extension on VS Code can easily create a new ESP-IDF project for the ESP32 with all the needed files and configurations automatically.
To create a new ESP-IDF project on VS Code, follow these steps:
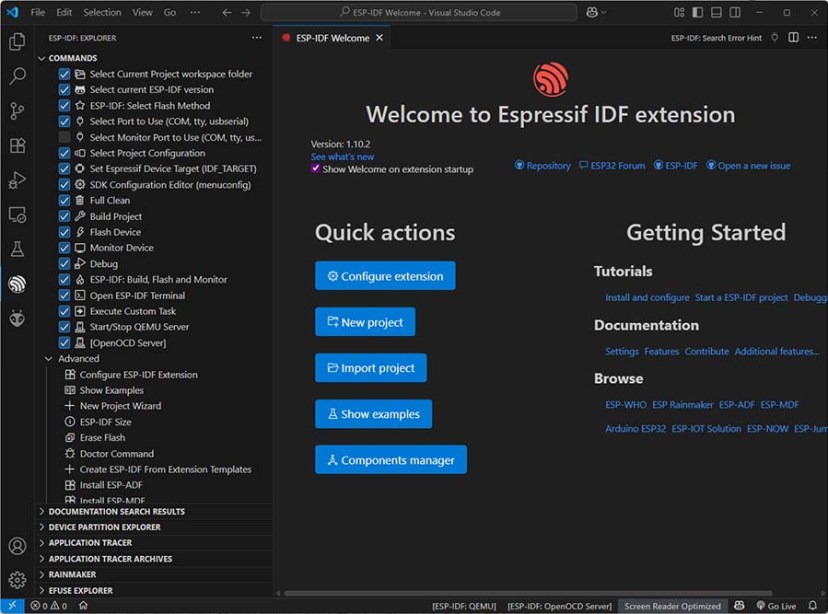
- Open the ESP-IDF Espressif extension
- Expand the “Advanced” menu
- Click the “New Project Wizard” option
- Choose the “Use ESP-IDF v5.4.1” to select the framework version

A new window opens, you need to fill in these fields:
- Project Name: type the desired project name;
- Enter Project Directory: click the folder icon and select the target folder to save all your project files. You can use any directory. Note: do NOT use a Google Drive / One Drive / Dropbox folder, because it will write/create many files during the building process—if it’s on a cloud folder, this process might be extremely slow;
- ESP-IDF Target: select the target device chip, I’m using an ESP32 with the esp32s3 chip;
- ESP-IDF Board: for the esp32s3 chip, I also need to select the configuration: ESP32-S chip (via builtin USB-JTAG);
- Serial Port: while having your ESP32 board connected to your computer, select the correct COM port number that refers to your ESP32;
- Choose Template: click the blue button to create a new project using a template.

In the menu, select the “ESP-IDF Templates” sample project and press the “Create project using template sample project” button.

Opening the ESP-IDF Project on VS Code
After a few seconds, a notification will appear on a new window on VS Code. You can click “Open Project” to open the newly created ESP-IDF sample project template.

IMPORTANT: if you didn’t see the notification that allows you to automatically open the ESP-IDF project on VS Code, you can easily do it by following these instructions:
Go to File > Open Folder…

Browse on your computer for the esp-idf-project folder (your project folder name that you’ve previously defined) and “Select Folder“.

That’s it! Your new ESP-IDF project template has been successfully created and opened.
Programming ESP32 with ESP-IDF using VS Code
That’s it, your first project has been created. You can get started programming your ESP32 boards with your first Blink project by following our guide ESP-IDF: ESP32 Blink LED Example.
Wrapping Up
In this tutorial, you learned how to create a template ESP32 project using VS Code. You can now program your ESP32 board using ESP-IDF.
Here are some ESP-IDF tutorials that you may find helpful:
- Programming ESP32 with ESP-IDF using VS Code – Getting Started Guide
- ESP-IDF: ESP32 Blink LED Example (VS Code)
- ESP-IDF: ESP32 GPIO – Control Digital Outputs
- ESP-IDF: ESP32 GPIO PWM with LEDC (Control LED Brightness)
You can check our ESP32 resources (with Arduino IDE) to learn more about the ESP32 board:
Thanks for reading.


It was recently announced that Arduino has been bought by Qualcomm. This is not a promising sign for the freedom of Arduino software and in particular its IDE. I believe there is an alternative, namely platformio. Perhaps its time fir you to look more closely at platformio…
Hi
We have several tutorials using and mentioning platformIO: https://randomnerdtutorials.com/?s=platformio
Regards,
sara