Learn how to make HTTP GET Requests with the ESP32 or ESP8266 boards programmed with MicroPython. We’ll first cover the basics of HTTP GET requests, and then, we’ll create and explain two different examples using the requests library.

HTTP requests are essential to interact with web services to retrieve data from external sources, integrate with web APIs to access third-party services, and much more, as you’ll see in this tutorial.
This tutorial is compatible with ESP32 and ESP8266 boards.
Table of Contents
In this tutorial, we’ll cover the following subjects.
- What are HTTP Requests?
- Technical Overview of HTTP Requests
- HTTP Requests with the ESP32 and ESP8266 (MicroPython)
- Getting Data from the Web Using HTTP GET Requests
Prerequisites – MicroPython Firmware
To follow this tutorial, you need MicroPython firmware installed on your ESP32 or ESP8266 boards. You also need an IDE to write and upload the code to your board. We suggest using Thonny IDE:
New to MicroPython? Check out our eBook: MicroPython Programming with ESP32 and ESP8266 eBook (2nd Edition)
What are HTTP Requests?
The most common way to exchange data with another computer (server) on the internet is using the HTTP protocol.
HTTP (Hypertext Transfer Protocol) works through a client-server model. In this model, the client communicates with a server using HTTP requests. An HTTP request is a message sent by the client to a server, typically to request a specific action or retrieve information. The server sends a response back to the client also through HTTP.

- Client: initiates communication through a request.
- Server: receives and processes the request and sends a response in return.
The ESP32 can either be a client or a server. When it is a client, it sends requests to servers. When it is a server, it handles the client’s requests. In this tutorial, we’ll take a look at the ESP32 and ESP8266 as an HTTP client that makes requests to a server.
Here are some examples of what you can do using HTTP requests with the ESP32/ESP8266:
- Get data from the internet: for example, time, current weather, stock prices, traffic updates, and much more…
- Datalogging: send data to the cloud to save your data online;
- Remote control of your ESP32: by interacting with IoT platforms like Adafruit IO, Node-RED, and others—you can interact with your board remotely by exchanging data via HTTP requests;
- Interact with third-party services to send notifications: SMS, emails, notifications, and much more…
Technical Overview of HTTP Requests
Let’s take a quick look at the technical aspects of HTTP requests. If this is your first time dealing with HTTP requests in a technical manner and it seems confusing, that’s perfectly normal.
But, don’t worry, there are MicroPython modules that abstract all the technical stuff, making it very straightforward to make and handle HTTP requests. Additionally, for more information about the technical aspects of HTTP requests, we recommend the following resources:
HTTP GET Requests
HTTP request consists of several parts. The main elements are: request line, headers, and body.
Request Line
The request line specifies the HTTP method, the resource being requested (the URL), and the version of the HTTP protocol being used. Common HTTP methods include GET, POST, PUT, and DELETE. For example:
GET /path/to/resource HTTP/1.1
Headers
Headers provide information about the request. It can include the host to which the client is sending the request, the type of content being sent or accepted, the user‑agent (which identifies the client making the request), and more. For example:
Host: example.com
User-Agent: ESP32
Accept: application/json
Body
The body is an optional content, and it contains data or information that we want to send to the server. This is used in POST and PUT requests. For example:
POST /submit-form HTTP/1.1
Content-Type: application/x-www-form-urlencoded
username=johndoe&password=secretpassword
HTTP Request Methods
The choice of HTTP method in a request indicates the intended action to be performed on the server. Some commonly used methods include:
- GET: retrieve data from the server.
- POST: submit data to be processed to a specified resource.
- PUT: update a resource on the server.
- DELETE: remove a resource from the server.
In this tutorial, we’ll focus on using GET requests with the ESP32/ESP8266.
HTTP Status Codes
After receiving an HTTP request, the server responds with an HTTP status code indicating the outcome of the request. Status codes fall into categories such as 2xx (successful), 3xx (redirection), 4xx (client error), and 5xx (server error). Some of the most common:
- 200 OK: the request was successful.
- 404 Not Found: the requested resource could not be found.
HTTP Requests with the ESP32 and ESP8266 NodeMCU (MicroPython)
The easiest way to make HTTP requests with the ESP32/ESP8266 programmed with MicroPython is using the requests library, which uses a high-level approach. This is very similar to the Python requests library, but is more limited.
You can also use the socket module, but it’s a more low-level approach and is not so beginner-friendly.
The following code is a basic example of how you can make a simple HTTP request to a URL using the requests library. This example makes a request to a Github page we created that simply contains the text “RandomNerdTutorials.com“
# Rui Santos & Sara Santos - Random Nerd Tutorials
# Complete project details: https://RandomNerdTutorials.com/micropython-http-get-requests-esp32-esp8266/

import network
import requests
import time

# Wi-Fi credentials
ssid = 'REPLACE_WITH_YOUR_SSID'
password = 'REPLACE_WITH_YOUR_PASSWORD'

# Connect to network
def connect_wifi(ssid, password):
    # Connect to your network
    station = network.WLAN(network.STA_IF)
    station.active(True)
    station.connect(ssid, password)

    # Wait for connection
    timeout = 10
    while not station.isconnected() and timeout > 0:
        time.sleep(1)
        timeout -= 1

    if station.isconnected():
        print('Connection successful')
        print(station.ifconfig())
        return True
    else:
        print('Connection failed. Timeout reached')
        return False

if connect_wifi(ssid, password):
    # Make GET request
    try:
        response = requests.get("https://gist.githubusercontent.com/RuiSantosdotme/9e834367f02c198bc6474938e4e3bb0d/raw/de66b26a95fc2d0b7620a43b49e57607bd4348e3/url.txt")
        # Get response code
        response_code = response.status_code
        # Get response content
        response_content = response.content
        # Print results
        print('Response code: ', response_code)
        print('Response content:', response_content)
    except Exception as e:
        print('An error occurred during the request:', str(e))
else:
print('Failed to connect to WiFi')How the Code Works
Start by including the network and the requests library.
import network
import requests
Replace ‘REPLACE_WITH_YOUR_SSID‘ and ‘REPLACE_WITH_YOUR_PASSWORD‘ with your Wi-Fi network name (SSID) and password.
ssid = 'REPLACE_WITH_YOUR_SSID'
password = 'REPLACE_WITH_YOUR_PASSWORD'
The following function connect_wifi() connects to a network with the SSID and password you pass when you call the function.
# Connect to network
def connect_wifi(ssid, password):
    # Connect to your network
    station = network.WLAN(network.STA_IF)
    station.active(True)
    station.connect(ssid, password)

    # Wait for connection
    timeout = 10
    while not station.isconnected() and timeout > 0:
        time.sleep(1)
        timeout -= 1

    if station.isconnected():
        print('Connection successful')
        print(station.ifconfig())
        return True
    else:
        print('Connection failed. Timeout reached')
        return False
Check if we are connected to the internet before attempting to make the request:
if connect_wifi(ssid, password):If we have a successful internet connection, make the request. Using the requests module and the get() method, the code sends a GET request to the desired URL. The response from the server is stored in the response variable.
response = requests.get("https://gist.githubusercontent.com/RuiSantosdotme/9e834367f02c198bc6474938e4e3bb0d/raw/de66b26a95fc2d0b7620a43b49e57607bd4348e3/url.txt")The response is an object of type Response. This object has several attributes that you can access that might be useful. For example:
- response.status_code: returns an integer value representing the status of the response;
- response.content: returns the actual content in bytes;
- response.text: returns the content converted to a string, using a character encoding such as UTF-8;
- response.json(): returns the response as a JSON object (dictionary);
- response.headers(): access information about the response’s headers.
After getting the response, we get the status of the response using the status_code attribute.
response_code = response.status_codeWe save the content of the response in the response_content variable using the content attribute.
response_content = response.contentFinally, we print the status code and request content to the Shell.
print('Response code: ', response_code)
print('Response content:', response_content)
We use try and except statements in case there is an error during the request:
except Exception as e:
    print('An error occurred during the request:', str(e))
Testing the Code
After inserting your network credentials, you can run the previous code on your ESP32 or ESP8266. Make sure Thonny IDE has a connection established with the board. Then, press the green RUN button.

If everything goes as expected, the response code should be 200, and it will print the content of the GitHub page, which should be “RandomNerdTutorials.com“.

Getting Data from the Web Using HTTP GET Requests
Now that you know how to make a basic HTTP GET request, we’ll show you a different example to get useful data from the internet. We’ll request information about the current weather using the Weather API.
ESP32/ESP8266 Weather Forecaster (HTTP GET Request)
In this example, we’ll use the Weather API to create a weather forecaster. This API is free and provides useful information about the weather in almost any location in the world.

We’ll get the weather data for your location and display it on the shell.
Getting Your API Key
- Go to the Weather API website: weatherapi.com
- Signup to create an account or login if you already have one.
- After verifying your account, login into your account.
- On your dashboard at weatherapi.com/my/ , you’ll find your API key.
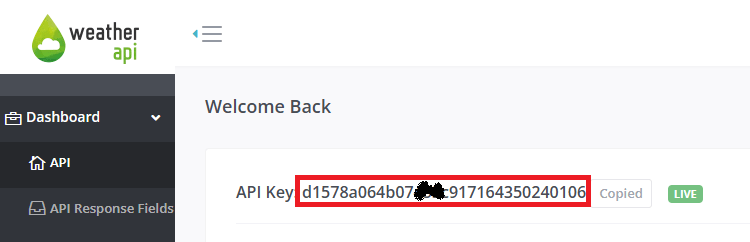
Copy the API key to a safe place because you’ll need it later.
To pull information on the weather in your chosen location, enter the following URL in your web browser, but insert your location and API key in the right places:
https://api.weatherapi.com/v1/current.json?q=YOUR_LOCATION+&key=YOUR_API_KEY
For example, in my case:
https://api.weatherapi.com/v1/current.json?q=Oporto+&key=d1578a064b07xxxc917164350240106Copy your URL and paste it into your browser, and the API will return information corresponding to your local weather. For example:
{
  "location": {
    "name": "Oporto",
    "region": "Porto",
    "country": "Portugal",
    "lat": 41.15,
    "lon": -8.6167,
    "tz_id": "Europe/Lisbon",
    "localtime_epoch": 1762168698,
    "localtime": "2025-11-03 11:18"
  },
  "current": {
    "last_updated_epoch": 1762168500,
    "last_updated": "2025-11-03 11:15",
    "temp_c": 16.1,
    "temp_f": 61,
    "is_day": 1,
    "condition": {
      "text": "Partly Cloudy",
      "icon": "//cdn.weatherapi.com/weather/64x64/day/116.png",
      "code": 1003
    },
    "wind_mph": 4,
    "wind_kph": 6.5,
    "wind_degree": 142,
    "wind_dir": "SE",
    "pressure_mb": 1023,
    "pressure_in": 30.21,
    "precip_mm": 0,
    "precip_in": 0,
    "humidity": 68,
    "cloud": 0,
    "feelslike_c": 16.1,
    "feelslike_f": 61,
    "windchill_c": 14.8,
    "windchill_f": 58.6,
    "heatindex_c": 14.7,
    "heatindex_f": 58.4,
    "dewpoint_c": 7.5,
    "dewpoint_f": 45.5,
    "vis_km": 10,
    "vis_miles": 6,
    "uv": 2.3,
    "gust_mph": 5.1,
    "gust_kph": 8.2
  }
}
For more information about the API, check the docs: Weather API Documentation.
Code – HTTP GET Request: Weather API (MicroPython)
The following code makes a request to the Weather API to get weather data on your location. Then, we display the data on the shell. We’ll display information about the current weather, temperature, humidity, and rain.
# Rui Santos & Sara Santos - Random Nerd Tutorials
# Complete project details: https://RandomNerdTutorials.com/micropython-http-get-requests-esp32-esp8266/

import network
import time
import requests

# Wi-Fi credentials
ssid = 'REPLACE_WITH_YOUR_SSID'
password = 'REPLACE_WITH_YOUR_PASSWORD'

api_key = 'REPLACE_WITH_YOUR_API_KEY'
location ='REPLACE_WITH_YOUR_LOCATION'

# Request URL
url = f'https://api.weatherapi.com/v1/current.json?q={location}+&key={api_key}'

# Connect to network
def connect_wifi(ssid, password):
    # Connect to your network
    station = network.WLAN(network.STA_IF)
    station.active(True)
    station.connect(ssid, password)

    # Wait for connection
    timeout = 10
    while not station.isconnected() and timeout > 0:
        time.sleep(1)
        timeout -= 1

    if station.isconnected():
        print('Connection successful')
        print(station.ifconfig())
        return True
    else:
        print('Connection failed - timeout reached')
        return False

if connect_wifi(ssid, password):
    try:
        # Make the request
        response = requests.get(url)
        #Print the response code
        print('Response code: ', response.status_code)

        # Get response content
        weather = response.json()
        # Close the request
        response.close()

        # Print bulk weather data
        print('Weather JSON: ', weather)

        # Get specific weather data
        weather_description = weather['current']['condition']['text']
        print('Current weather: ', weather_description)

        # Temperature and humidity
        temperature_c = weather['current']['temp_c']
        temperature_f = weather['current']['temp_f']
        humidity = weather['current']['humidity']
        print(f'Temperature in Celsius: {temperature_c:.2f}')
        print(f'Temperature in Fahrenheit: {temperature_f:.2f}')
        print(f'Humidity (%): {humidity:.2f}')

        # Precipitation
        precipitation = weather['current']['precip_mm']
        print(f'Precipitation in mm: {precipitation}')

        # Wind
        wind_speed = weather['current']['wind_kph']
        print('Wind speed in kph:', wind_speed)

    except Exception as e:
        # Handle any exceptions during the request
print('Error during request:', e)How the Code Works
First, you need to insert your network credentials to connect your board to the internet.
# Wi-Fi credentials
ssid = 'REPLACE_WITH_YOUR_SSID'
password = 'REPLACE_WITH_YOUR_PASSWORD'
Then, insert your Weather API key, and the city from where you want to get the data.
api_key = 'REPLACE_WITH_YOUR_API_KEY'
location = 'REPLACE_WITH_YOUR_CITY'
For example, in my case:
api_key = 'd1578a064b07xxxc917164350240106'
location ='Oporto'
We save the request URL in the url variable. This is an f string with placeholders so that the URL is updated with your details at run time.
url = f'https://api.weatherapi.com/v1/current.json?q={location}+&key={api_key}'Then, we connect to the internet by calling the connect_wifi() function (created before) and passing the SSID and password as arguments:
if connect_wifi(ssid, password):If we are successfully connected to the internet, we’ll make the request.
As we’ve seen in the previous example, making the request is as simple as using the get() method of the requests module and passing the URL as an argument.
response = requests.get(url)This will return a JSON object. So, we can convert the result into a Python dictionary using the json() method.
weather = response.json()Then, we close the connection to release any resources.
# Close the request
response.close()
Now, we have all the data you’ve seen on your web browser in the previous steps saved in the weather variable.
You access specific information by using the keys of the data you want to get. We get weather description, temperature, humidity, precipitation, and wind speed. You can also get other properties by accessing the corresponding keys on the JSON object.
# Get specific weather data
weather_description = weather['current']['condition']['text']
print('Current weather: ', weather_description)

# Temperature and humidity
temperature_c = weather['current']['temp_c']
temperature_f = weather['current']['temp_f']
humidity = weather['current']['humidity']
print(f'Temperature in Celsius: {temperature_c:.2f}')
print(f'Temperature in Fahrenheit: {temperature_f:.2f}')
print(f'Humidity (%): {humidity:.2f}')

# Precipitation
precipitation = weather['current']['precip_mm']
print(f'Precipitation in mm: {precipitation}')

# Wind
wind_speed = weather['current']['wind_kph']
print('Wind speed in kph:', wind_speed)
Testing the Code
After inserting your network credentials, API key, and city, you can run the code on your ESP32 or ESP8266 board.
You should get something as shown in the screenshot below, but with the information for your chosen location.

And that’s it. You successfully requested data from the Weather API.
Wrapping Up
In this tutorial, you learned about HTTP GET requests with the ESP32 and ESP8266 programmed with MicroPython. You learned why they are useful for IoT projects and learned how to get data from the internet using HTTP GET requests.
As an example, we’ve shown you how to get weather data. You can take this project further by displaying the data on a display, like an LCD, OLED, or TFT display. You can create a while loop or a timer interrupt to request data periodically, or you can even request data for multiple locations just by changing the value of the location variable.
We have some tutorials that you can find useful:
- MicroPython: OLED Display with ESP32 and ESP8266
- MicroPython: I2C LCD Display with ESP32/ESP8266
- MicroPython: ESP32 Cheap Yellow Display Board – CYD (ESP32-2432S028R)
If you want to learn more about programming the ESP32 and ESP8266 boards using MicroPython, check out our resources:
Thanks for reading.


