Learn how to interface TM1637 4-Digit LED 7-Segment Display with the ESP32 and ESP8266 boards programmed with MicroPython. Learn how to wire the display to the boards and how to program them to display text, numbers, and custom characters. As an example, we’ll build a weather forecaster display.

Table of Contents
In this tutorial, we’ll cover the following topics:
- Introducing the TM1637 4-Digit LED 7-Segment Display
- Wiring the TM1637 4-Digit 7-Segment Display to the ESP32 or ESP8266
- TM1637 MicroPython Library
- Testing the TM1637 Display (Basic Functions)
- TM1637 Display – Temperature and Weather Forecaster
New to MicroPython? Check out our eBook: MicroPython Programming with ESP32 and ESP8266 eBook (2nd Edition)
Prerequisites
To follow this tutorial, you need MicroPython firmware installed in your ESP32 or ESP8266 boards. You also need an IDE to write and upload the code to your board. We suggest using Thonny IDE or uPyCraft IDE:
- Thonny IDE:
- uPyCraft IDE:
- Getting Started with uPyCraft IDE
- Install uPyCraft IDE (Windows, Mac OS X, Linux)
- Flash/Upload MicroPython Firmware to ESP32 and ESP8266
Introducing the TM1637 4-Digit LED 7-Segment Display
The TM1637 4-Digit LED 7-Segment display is a display module that combines four 7-segment digits on a single display that can be controlled via the TM1637 driver. The particular module we’re using here has four digits separated by a colon between the second and third digits.

There are similar modules with dots between the digits.
There are also similar modules with six 7-segment digits. These require a different library from the one we’ll use in this tutorial.
Note: I tried to use my six 7-segment display module, but it seems that there are many of those displays that come faulty by default. I couldn’t make mine work. So, this tutorial will be only about the one with four digits with a colon in the middle.
Where to Buy?
You can check our Maker Advisor Tools page to compare the TM1637 4-Digit 7-Segment Display module price in different stores:
You can use the preceding links or go directly to MakerAdvisor.com/tools to find all the parts for your projects at the best price!

Wiring the TM1637 4-Digit 7-Segment Display to the ESP32 or ESP8266

Wiring the display to the ESP32 and ESP8266 is quite simple, as it only requires two digital pins: CLK and DI/O.
| TM1637 Display | ESP32 | ESP8266 |
| CLK | Any digital pin (for example: GPIO 19)* | Any digital pin (for example: GPIO 14 (D5))* |
| DIO | Any digital pin (for example: GPIO 18)* | Any digital pin (for example: GPIO 12 (D6))* |
| VCC | VIN | VIN |
| GND | GND | GND |
* you can use any other suitable GPIOs. Check the ESP32 and ESP8266 Pinout Guides:
- ESP32 Pinout Reference: Which GPIO pins should you use?
- ESP32-S3 DevKitC Pinout Reference Guide: GPIOs Explained
- ESP8266 Pinout Reference: Which GPIO pins should you use?
ESP32
We’ll connect the CLK pin to GPIO 19, and the DIO pin to GPIO 18, but you can use another combination of pins.

ESP8266
We’ll connect the CLK pin to GPIO 14 (D5), and the DIO pin to GPIO 12 (D6), but you can use a different combination of pins.

TM1637 MicroPython Library
To make it easy to interface with the TM1637 Display, we’ll use a forked version of this TM1637 MicroPython module.
Follow the next steps to install it.
- Click here to download our forked version of the tm1637.py file.
- Copy the code to a file on Thonny IDE;
- Go to File > Save as… and select MicroPython Device;
- Save the file with the name tm1637.py (don’t change the name).

"""
MicroPython TM1637 quad 7-segment LED display driver
https://github.com/mcauser/micropython-tm1637

MIT License
Copyright (c) 2016-2023 Mike Causer

Permission is hereby granted, free of charge, to any person obtaining a copy
of this software and associated documentation files (the "Software"), to deal
in the Software without restriction, including without limitation the rights
to use, copy, modify, merge, publish, distribute, sublicense, and/or sell
copies of the Software, and to permit persons to whom the Software is
furnished to do so, subject to the following conditions:

The above copyright notice and this permission notice shall be included in all
copies or substantial portions of the Software.

THE SOFTWARE IS PROVIDED "AS IS", WITHOUT WARRANTY OF ANY KIND, EXPRESS OR
IMPLIED, INCLUDING BUT NOT LIMITED TO THE WARRANTIES OF MERCHANTABILITY,
FITNESS FOR A PARTICULAR PURPOSE AND NONINFRINGEMENT. IN NO EVENT SHALL THE
AUTHORS OR COPYRIGHT HOLDERS BE LIABLE FOR ANY CLAIM, DAMAGES OR OTHER
LIABILITY, WHETHER IN AN ACTION OF CONTRACT, TORT OR OTHERWISE, ARISING FROM,
OUT OF OR IN CONNECTION WITH THE SOFTWARE OR THE USE OR OTHER DEALINGS IN THE
SOFTWARE.
"""

__version__ = '1.3.0'

from micropython import const
from machine import Pin
from time import sleep_us, sleep_ms

TM1637_CMD1 = const(64)  # 0x40 data command
TM1637_CMD2 = const(192) # 0xC0 address command
TM1637_CMD3 = const(128) # 0x80 display control command
TM1637_DSP_ON = const(8) # 0x08 display on
TM1637_DELAY = const(10) # 10us delay between clk/dio pulses
TM1637_MSB = const(128)  # msb is the decimal point or the colon depending on your display

# 0-9, a-z, blank, dash, star
_SEGMENTS = bytearray(b'\x3F\x06\x5B\x4F\x66\x6D\x7D\x07\x7F\x6F\x77\x7C\x39\x5E\x79\x71\x3D\x76\x06\x1E\x76\x38\x55\x54\x3F\x73\x67\x50\x6D\x78\x3E\x1C\x2A\x76\x6E\x5B\x00\x40\x63')

class TM1637(object):
    """Library for quad 7-segment LED modules based on the TM1637 LED driver."""
    def __init__(self, clk, dio, brightness=7):
        self.clk = clk
        self.dio = dio

        if not 0 <= brightness <= 7:
            raise ValueError("Brightness out of range")
        self._brightness = brightness

        self.clk.init(Pin.OUT, value=0)
        self.dio.init(Pin.OUT, value=0)
        sleep_us(TM1637_DELAY)

        self._write_data_cmd()
        self._write_dsp_ctrl()

    def _start(self):
        self.dio(0)
        sleep_us(TM1637_DELAY)
        self.clk(0)
        sleep_us(TM1637_DELAY)

    def _stop(self):
        self.dio(0)
        sleep_us(TM1637_DELAY)
        self.clk(1)
        sleep_us(TM1637_DELAY)
        self.dio(1)

    def _write_data_cmd(self):
        # automatic address increment, normal mode
        self._start()
        self._write_byte(TM1637_CMD1)
        self._stop()

    def _write_dsp_ctrl(self):
        # display on, set brightness
        self._start()
        self._write_byte(TM1637_CMD3 | TM1637_DSP_ON | self._brightness)
        self._stop()

    def _write_byte(self, b):
        for i in range(8):
            self.dio((b >> i) & 1)
            sleep_us(TM1637_DELAY)
            self.clk(1)
            sleep_us(TM1637_DELAY)
            self.clk(0)
            sleep_us(TM1637_DELAY)
        self.clk(0)
        sleep_us(TM1637_DELAY)
        self.clk(1)
        sleep_us(TM1637_DELAY)
        self.clk(0)
        sleep_us(TM1637_DELAY)

    def brightness(self, val=None):
        """Set the display brightness 0-7."""
        # brightness 0 = 1/16th pulse width
        # brightness 7 = 14/16th pulse width
        if val is None:
            return self._brightness
        if not 0 <= val <= 7:
            raise ValueError("Brightness out of range")

        self._brightness = val
        self._write_data_cmd()
        self._write_dsp_ctrl()

    def write(self, segments, pos=0):
        """Display up to 6 segments moving right from a given position.
        The MSB in the 2nd segment controls the colon between the 2nd
        and 3rd segments."""
        if not 0 <= pos <= 5:
            raise ValueError("Position out of range")
        self._write_data_cmd()
        self._start()

        self._write_byte(TM1637_CMD2 | pos)
        for seg in segments:
            self._write_byte(seg)
        self._stop()
        self._write_dsp_ctrl()

    def encode_digit(self, digit):
        """Convert a character 0-9, a-f to a segment."""
        return _SEGMENTS[digit & 0x0f]

    def encode_string(self, string):
        """Convert an up to 4 character length string containing 0-9, a-z,
        space, dash, star to an array of segments, matching the length of the
        source string."""
        segments = bytearray(len(string))
        for i in range(len(string)):
            segments[i] = self.encode_char(string[i])
        return segments

    def encode_char(self, char):
        """Convert a character 0-9, a-z, space, dash or star to a segment."""
        o = ord(char)
        if o == 32:
            return _SEGMENTS[36] # space
        if o == 42:
            return _SEGMENTS[38] # star/degrees
        if o == 45:
            return _SEGMENTS[37] # dash
        if o >= 65 and o <= 90:
            return _SEGMENTS[o-55] # uppercase A-Z
        if o >= 97 and o <= 122:
            return _SEGMENTS[o-87] # lowercase a-z
        if o >= 48 and o <= 57:
            return _SEGMENTS[o-48] # 0-9
        raise ValueError("Character out of range: {:d} '{:s}'".format(o, chr(o)))

    def hex(self, val):
        """Display a hex value 0x0000 through 0xffff, right aligned."""
        string = '{:04x}'.format(val & 0xffff)
        self.write(self.encode_string(string))

    def number(self, num):
        """Display a numeric value -999 through 9999, right aligned."""
        # limit to range -999 to 9999
        num = max(-999, min(num, 9999))
        string = '{0: >4d}'.format(num)
        self.write(self.encode_string(string))

    def numbers(self, num1, num2, colon=True):
        """Display two numeric values -9 through 99, with leading zeros
        and separated by a colon."""
        num1 = max(-9, min(num1, 99))
        num2 = max(-9, min(num2, 99))
        segments = self.encode_string('{0:0>2d}{1:0>2d}'.format(num1, num2))
        if colon:
            segments[1] |= 0x80 # colon on
        self.write(segments)

    def temperature(self, num):
        if num < -9:
            self.show('lo') # low
        elif num > 99:
            self.show('hi') # high
        else:
            string = '{0: >2d}'.format(num)
            self.write(self.encode_string(string))
        self.write([_SEGMENTS[38], _SEGMENTS[12]], 2) # degrees C

    def temperature_f(self, num):
        if num < -9:
            self.show('lo') # low
        elif num > 99:
            self.show('hi') # high
        else:
            string = '{0: >2d}'.format(num)
            self.write(self.encode_string(string))
        self.write([_SEGMENTS[38], _SEGMENTS[15]], 2) # degrees F

    def show(self, string, colon=False):
        segments = self.encode_string(string)
        if len(segments) > 1 and colon:
            segments[1] |= 128
        self.write(segments[:4])

    def scroll(self, string, delay=250):
        segments = string if isinstance(string, list) else self.encode_string(string)
        data = [0] * 8
        data[4:0] = list(segments)
        for i in range(len(segments) + 5):
            self.write(data[0+i:4+i])
            sleep_ms(delay)


class TM1637Decimal(TM1637):
    """Library for quad 7-segment LED modules based on the TM1637 LED driver.

    This class is meant to be used with decimal display modules (modules
    that have a decimal point after each 7-segment LED).
    """

    def encode_string(self, string):
        """Convert a string to LED segments.

        Convert an up to 4 character length string containing 0-9, a-z,
        space, dash, star and '.' to an array of segments, matching the length of
        the source string."""
        segments = bytearray(len(string.replace('.','')))
        j = 0
        for i in range(len(string)):
            if string[i] == '.' and j > 0:
                segments[j-1] |= TM1637_MSB
                continue
            segments[j] = self.encode_char(string[i])
            j += 1
        return segments
With the module loaded to the board, you can now use the library functionalities in your code to interface with the TM1637 display.
Testing the TM1637 Display (Basic Functions)
The following example shows most of the functions supported by the library. This is a modified and simplified version of the example provided by the library.
# Rui Santos & Sara Santos - Random Nerd Tutorials
# Complete project details at https://RandomNerdTutorials.com/micropython-esp32-esp8266-tm1637-display/
import tm1637
from machine import Pin
from time import sleep
# Initialize display (adjust pins if needed)
display = tm1637.TM1637(clk=Pin(19), dio=Pin(18))
# Example for ESP8266 boards:
#display = tm1637.TM1637(clk=Pin(14), dio=Pin(12))
# Set display brightness
display.brightness(7)
while True:
# all LEDS on "88:88"
display.write([127, 255, 127, 127])
sleep(1)
# all LEDS off
display.write([0, 0, 0, 0])
sleep(1)
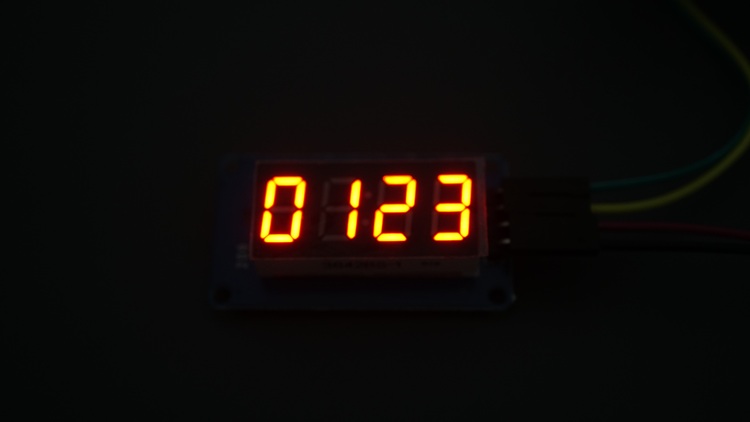
# show "0123"
display.write([63, 6, 91, 79])
sleep(1)
# show "COOL"
display.write([0b00111001, 0b00111111, 0b00111111, 0b00111000])
sleep(1)
# show "HELP"
display.show('help')
sleep(1)
# display "dEAd", "bEEF"
display.hex(0xdead)
sleep(1)
display.hex(0xbeef)
sleep(1)
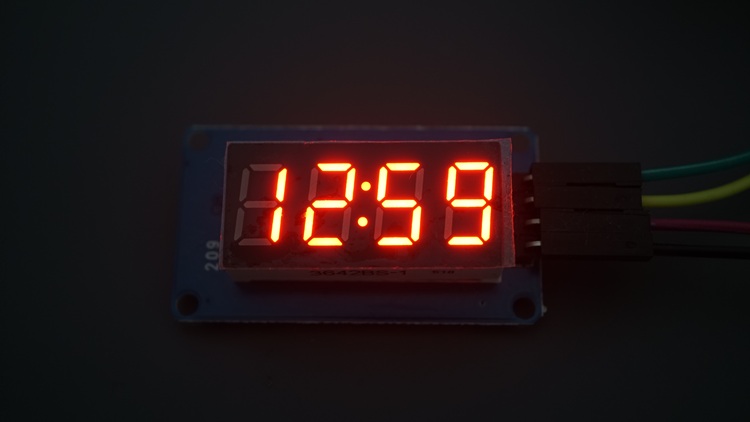
# show "12:59"
display.numbers(12, 59)
sleep(1)
# show "-123"
display.number(-123)
sleep(1)
# show temperature '24*C'
display.temperature(24)
sleep(1)
# show temperature '75*F'
display.temperature_f(75)
sleep(1)
# display scrolling text
display.scroll('Random Nerd Tutorials', delay=500)
sleep(1)
Now, let’s take a quick look at how the code works to understand how to use the library functions to control the display.
Initialize the Display
The following line initializes the display. You can modify it to use different pins.
display = tm1637.TM1637(clk=Pin(19), dio=Pin(18))If you’re using an ESP8266 board, you can use the following combination of pins:
display = tm1637.TM1637(clk=Pin(14), dio=Pin(12))Set the Brightness
To set the display brightness, you just need to use the brightness() method on the display object. Pass a number between 0 (minimum brightness) and 7 (maximum brightness).
display.brightness(7)Writing Segments
You can use the write() method on the display object to control individual segments of each character.
The TM1637 display comes with four 7-segment display digits. You can manually control individual segments of each digit with the write() method on the display object.
One byte (7 lower bits) for each segment. The 8th bit (MSB) is for the colon and only on the 2nd segment.

For example:
| segment | bit |
| A | 0 |
| B | 1 |
| C | 2 |
| D | 3 |
| E | 4 |
| F | 5 |
| G | 6 |
Bit 1 turns a segment ON, and bit 0 turns a segment off.
For example, to turn on segments A, B, and C, you’d have a byte like 0b0000111.
The byte starts with the G and ends with the A. For example:
- 0b0000110 turns segments C and B on.
You can use 0b0000110 or the corresponding hex or decimal number. See the table provided by the library documentation.
The demo shows different examples:
# all LEDS on "88:88"
display.write([127, 255, 127, 127])
sleep(1)

# all LEDS off
display.write([0, 0, 0, 0])
sleep(1)

# show "0123"
display.write([63, 6, 91, 79])
sleep(1)

# show "COOL"
display.write([0b00111001, 0b00111111, 0b00111111, 0b00111000])
sleep(1)
Display Strings
To display strings, use the show() method and pass as an argument the string you want to display.
# show "HELP"
display.show('help')
Display a Number
Use the numbers() method if you want to display two numbers (with two digits) on each side of the colon. For example:
# show "12:59"
display.numbers(12, 59)
To display a number, use the number() method. It accepts negative numbers. The number shouldn’t have more than four digits.
# show "-123"
display.number(-123)
Display Temperature Values
If you want to display temperature values (with two digits) with the ºC and ºF symbols, you can use the temperature() and temperature_f() functions on the display object. For example, in the code:
# show temperature '24*C'
display.temperature(24)
sleep(1)

# show temperature '75*F'
display.temperature_f(75)
sleep(1)
Display Scrolling Text
There is a very useful function if you want to display text with more than four characters. The scroll() function allows you to scroll a String on the display from right to left with adjustable speed.
The first argument is the string you want to display, and the second argument is the offset in milliseconds. For example:
# display scrolling text
display.scroll('Random Nerd Tutorials', delay=500)
Demonstration
Run or upload (File > Save as > Micropython device > save the file with the name main.py) the code to your board using Thonny IDE.

Don’t forget that you must have uploaded the tm1637.py library previously.
The display will be running the demo code, showing the different use cases.

TM1637 Display – Temperature and Weather Forecaster
In this section, we’ll use the TM1637 Display in a practical application. We’ll display the current temperature, both in degrees Celsius and Fahrenheit, and the current weather condition.
WeatherAPI
We’ll get that data from the WeatherAPI by making an HTTP request to the proper URL. To learn more about HTPP requests with Micropython, check this tutorial: MicroPython: HTTP GET Requests with ESP32/ESP8266.
This API is free and provides useful information about the weather in almost any location in the world.

We’ll get data about the temperature and weather conditions and display them on the TM1637 display. You can easily adjust the code to display more information.
Getting Your API Key
- Go to the Weather API website: weatherapi.com
- Signup to create an account or login if you already have one.
- After verifying your account, login into your account.
- On your dashboard at weatherapi.com/my/ , you’ll find your API key.
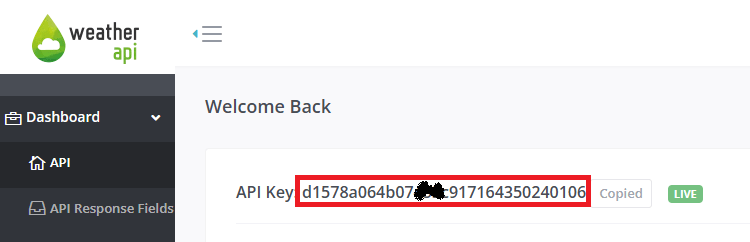
Copy the API key to a safe place because you’ll need it later.
To pull information on the weather in your chosen location, enter the following URL in your web browser, but insert your location and API key in the right places:
https://api.weatherapi.com/v1/current.json?q=YOUR_LOCATION+&key=YOUR_API_KEY
For example, in my case:
https://api.weatherapi.com/v1/current.json?q=Oporto+&key=d1578a064b07xxxc917164350240106Copy your URL and paste it into your browser, and the API will return information corresponding to your local weather. For example:
{
  "location": {
    "name": "Oporto",
    "region": "Porto",
    "country": "Portugal",
    "lat": 41.15,
    "lon": -8.6167,
    "tz_id": "Europe/Lisbon",
    "localtime_epoch": 1762168698,
    "localtime": "2025-11-03 11:18"
  },
  "current": {
    "last_updated_epoch": 1762168500,
    "last_updated": "2025-11-03 11:15",
    "temp_c": 16.1,
    "temp_f": 61,
    "is_day": 1,
    "condition": {
      "text": "Partly Cloudy",
      "icon": "//cdn.weatherapi.com/weather/64x64/day/116.png",
      "code": 1003
    },
    "wind_mph": 4,
    "wind_kph": 6.5,
    "wind_degree": 142,
    "wind_dir": "SE",
    "pressure_mb": 1023,
    "pressure_in": 30.21,
    "precip_mm": 0,
    "precip_in": 0,
    "humidity": 68,
    "cloud": 0,
    "feelslike_c": 16.1,
    "feelslike_f": 61,
    "windchill_c": 14.8,
    "windchill_f": 58.6,
    "heatindex_c": 14.7,
    "heatindex_f": 58.4,
    "dewpoint_c": 7.5,
    "dewpoint_f": 45.5,
    "vis_km": 10,
    "vis_miles": 6,
    "uv": 2.3,
    "gust_mph": 5.1,
    "gust_kph": 8.2
  }
}
For more information about the API, check the docs: Weather API Documentation.
We’ll only get the information under temp_c, temp_f, and text(weather description) under the current node.
Code
The following code gets the data from the API and displays the current temperature and weather description on the display.
# Rui Santos & Sara Santos - Random Nerd Tutorials
# Complete project details at https://RandomNerdTutorials.com/micropython-esp32-esp8266-tm1637-display/
import network
import time
import requests
import tm1637
from machine import Pin, Timer

# Initialize display (adjust pins if needed)
display = tm1637.TM1637(clk=Pin(21), dio=Pin(20))

# Wi-Fi credentials
ssid = 'REPLACE_WITH_YOUR_SSID'
password = 'REPLACE_WITH_YOUR_PASSWORD'

api_key = 'REPLACE_WITH_YOUR_weatherapi'
location ='Oporto'   # Documentation https://www.weatherapi.com/docs/

# Request URL
url = f'https://api.weatherapi.com/v1/current.json?q={location}+&key={api_key}'

# Connect to network
def connect_wifi(ssid, password):
    # Connect to your network
    station = network.WLAN(network.STA_IF)
    station.active(True)
    station.connect(ssid, password)

    # Wait for connection
    timeout = 10
    while not station.isconnected() and timeout > 0:
        time.sleep(1)
        timeout -= 1

    if station.isconnected():
        print('Connection successful')
        print(station.ifconfig())
        return True
    else:
        print('Connection failed - timeout reached')
        return False

def getWeather(timer):
    if connect_wifi(ssid, password):
        try:
            # Make the request
            response = requests.get(url)
            #Print the response code
            print('Response code: ', response.status_code)

            # Get response content
            weather = response.json()
            # Close the request
            response.close()

            # Print bulk weather data
            print('Weather JSON: ', weather)

            # Declare these variables as globals
            global weather_description, temperature_c, temperature_f

            # Get specific weather data
            weather_description = weather['current']['condition']['text']
            print('Current weather: ', weather_description)

            # Temperature and humidity
            temperature_c = weather['current']['temp_c']
            temperature_f = weather['current']['temp_f']
            print(f'Temperature in Celsius: {temperature_c:.2f}')
            print(f'Temperature in Fahrenheit: {temperature_f:.2f}')

        except Exception as e:
            # Handle any exceptions during the request
            print('Error during request:', e)
            display.show('erro')

# Get Weather for the first time
getWeather(0)

# Create a periodic timer that gets new data from the API
api_timer = Timer()
api_timer.init(mode=Timer.PERIODIC, period=3600000, callback=getWeather)

while True:
    display.scroll(weather_description)
    time.sleep(1)
    display.temperature(round(temperature_c))
    time.sleep(5)
    display.temperature_f(round(temperature_f))
    time.sleep(5)
How Does the Code Work?
Import the required modules, including the requests library to make HTTP requests to get the weather data.
import network
import time
import requests
import tm1637
from machine import Pin, Timer
Initialize the display on the proper GPIOs.
# Initialize display (adjust pins if needed)
display = tm1637.TM1637(clk=Pin(19), dio=Pin(18))
Insert your network credentials on the following lines so that the ESP can connect to your network to get weather data.
# Wi-Fi credentials
ssid = 'REPLACE_WITH_YOUR_SSID'
password = 'REPLACE_WITH_YOUR_PASSWORD'
Insert your WeatherAPI API key and the location for which you want to retrieve the data.
api_key = 'REPLACE_WITH_YOUR_API_KEY'
location ='REPLACE_WITH_YOUR_LOCATION'
We save the request URL in the url variable. This is an f string with placeholders so that the URL is updated with your details at run time.
# Request URL
url = f'https://api.weatherapi.com/v1/current.json?q={location}+&key={api_key}'
The connect_wifi() function connects your board to your network. It returns true if successful, or false otherwise.
# Connect to network
def connect_wifi(ssid, password):
    # Connect to your network
    station = network.WLAN(network.STA_IF)
    station.active(True)
    station.connect(ssid, password)

    # Wait for connection
    timeout = 10
    while not station.isconnected() and timeout > 0:
        time.sleep(1)
        timeout -= 1

    if station.isconnected():
        print('Connection successful')
        print(station.ifconfig())
        return True
    else:
        print('Connection failed - timeout reached')
        return False
Then, we create a function called getWeather() that will be called periodically by a timer (hence, we need to have an argument of type timer). Learn more about MicroPython timers here.
def getWeather(timer):
    if connect_wifi(ssid, password):
        try:
            # Make the request
            response = requests.get(url)
            #Print the response code
            print('Response code: ', response.status_code)

            # Get response content
            weather = response.json()
            # Close the request
            response.close()

            # Print bulk weather data
            print('Weather JSON: ', weather)

            # Declare these variables as globals
            global weather_description, temperature_c, temperature_f

            # Get specific weather data
            weather_description = weather['current']['condition']['text']
            print('Current weather: ', weather_description)

            # Temperature and humidity
            temperature_c = weather['current']['temp_c']
            temperature_f = weather['current']['temp_f']
            print(f'Temperature in Celsius: {temperature_c:.2f}')
            print(f'Temperature in Fahrenheit: {temperature_f:.2f}')

        except Exception as e:
            # Handle any exceptions during the request
            print('Error during request:', e)
            display.show('erro')
We first check if we are successfully connected to the internet.
if connect_wifi(ssid, password):Then, we make the request and read the JSON response.
try:
    # Make the request
    response = requests.get(url)
    #Print the response code
    print('Response code: ', response.status_code)

    # Get response content
    weather = response.json()
    # Close the request
    response.close()
After that, we create global variables weather_description, temperature_c and temperature_f to save the data we’re looking for.
# Declare these variables as globals
global weather_description, temperature_c, temperature_f
We get the weather data we want and save them on the corresponding variables.
# Get specific weather data
weather_description = weather['current']['condition']['text']
print('Current weather: ', weather_description)

# Temperature and humidity
temperature_c = weather['current']['temp_c']
temperature_f = weather['current']['temp_f']
print(f'Temperature in Celsius: {temperature_c:.2f}')
print(f'Temperature in Fahrenheit: {temperature_f:.2f}')
After that, we call the getWeather() function for the first time when the code first turns.
# Get Weather for the first time
getWeather(0)
Then, we create a timer that will call the getWeather() function every 3600000 milliseconds (one hour) to get the latest weather data from the API.
# Create a periodic timer that gets new data from the API
api_timer = Timer (1)
api_timer.init(mode=Timer.PERIODIC, period=3600000, callback=getWeather)
Learn more about creating timers: MicroPython: Timer Interrupts with the ESP32/ESP8266.
Finally, we create a while True loop to continuously display wheather data. We display the weather description, the temperature in Celsius, and the temperature in Fahrenheit.
while True:Notice that for the weather description, we use the scroll() function.
display.scroll(weather_description)
time.sleep(1)
To display the temperature in Celsius, we call the temperature() function. We need to round the temperature because the function only accepts numbers with two digits.
display.temperature(round(temperature_c))
time.sleep(5)
Finally, we call the temperature_f() function to display the temperature in Fahrenheit.
display.temperature_f(round(temperature_f))
time.sleep(5)
Demonstration
Make sure you’ve inserted your network credentials, your API key and location on the code.
Run or upload (File > Save as > Micropython device > save the file with the name main.py) the code to your board using Thonny IDE.
Don’t forget that you must have uploaded the tm1637.py library previously.
You’ll get the current temperature for your location in Celsius and Fahrenheit, and the current weather.


In the MicroPython Shell, it will display the complete JSON response, the current weather, and the temperature.

Wrapping Up
In this tutorial, you learned how to interface the TM1637 4-digit 7-segment display with the ESP32 and ESP8266 programmed with MicroPython. As you’ve seen, it is straightforward to display data on the screen thanks to the tm1637.py module.
You can display a wide variety of data on the display, but the most common uses are to display temperature and to create a digital clock or a countdown timer.
We hope you’ve found this guide useful. We have MicroPython guides for other displays that you may be interested in:
- MicroPython: OLED Display with ESP32 and ESP8266
- MicroPython: I2C LCD Display with ESP32/ESP8266
- MicroPython: ESP32 Cheap Yellow Display Board – CYD (ESP32-2432S028R)
If you want to learn more about programming the ESP32 and ESP8266 boards using MicroPython, check out our resources:
Thanks for reading.


