In this project you’ll learn how to use the ESP Easy firmware on a Sonoff basic smart switch and control it with Node-RED using Node-RED dashboard. The Node-RED software is running on a Raspberry Pi. The ESP Easy firmware can also be integrated with other home automation platforms like Home Assistant, Domoticz, openHAB, etc…
Watch the Project Video Demonstration
We recommend using the following tutorials as a reference:
- Sonoff – $5 WiFi Wireless Smart Switch Introduction
- Reprogram Sonoff Smart Switch with Web Server
- How to Flash a Custom Firmware to Sonoff
Project Overview
By the end of this project you’ll have a Sonoff running the ESP Easy firmware that can be controlled with HTTP GET requests using a web browser or another Wi-Fi enabled device. After completing the configuration on the ESPEasy web interface, you can integrate it with most home automation platforms. For this example, I’ll be using Node-RED that is running on a Raspberry Pi. After connecting a couple of nodes, you can control the Sonoff using a button in your Node-RED dashboard.
The figure below shows a high-level overview on how the project works:

Prerequisites:
- You should be familiar with the Raspberry Pi – read Getting Started with Raspberry Pi;
- You should have the Raspbian operating system installed in your Raspberry Pi – read Installing Raspbian Lite, Enabling and Connecting with SSH;
- You also need Node-RED and Node-RED Dashboard installed in your Raspberry Pi.
If you like home automation and you want to learn more about Node-RED, Raspberry Pi, ESP8266 and Arduino. I recommend that you download my course: Build a Home Automation System for $100.
Parts Required
Here’s a complete list of the parts required for this project:
- Sonoff Wi-Fi Smart Switch
- FTDI Programmer
- Raspberry Pi Board – read Best Raspberry Pi Starter Kits
- MicroSD Card – at least 8GB Class10
- Raspberry Pi Power Supply (5V 2.5A)
You can use the preceding links or go directly to MakerAdvisor.com/tools to find all the parts for your projects at the best price!

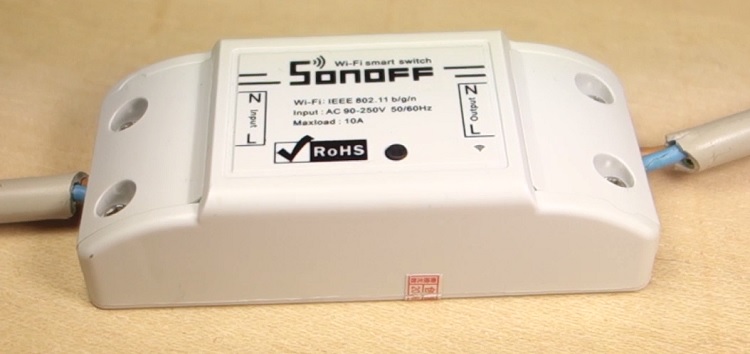
About the Sonoff
The Sonoff is a device that you put in series with your power lines allowing you to remotely turn any device on and off.
In simple terms, a Sonoff device contains an ESP8266 chip connected to a relay. This way you can connect to the Sonoff via Wi-Fi to control the relay. The sonoff comes with a firmware that allows you to control it using the eWeLink app. However, most people prefer to flash the Sonoff device with custom firmware as we’ll do in this project.
Safety Warning
Make sure your Sonoff is disconnected from mains voltage while you are uploading a new firmware. Never touch any Sonoff component while it’s connected to mains voltage. After everything is disconnected and unplugged, open the Sonoff’s plastic box enclosure.

Sonoff Pinout
The Sonoff is meant to be hacked, and you can see clearly that some connections were left out, so that you can solder some pins and upload a custom firmware. The figure below shown the pinout.

The Sonoff comes with an ESP8266 Wi-Fi chip built-in that we can re-program with a custom firmware.

I’ve soldered 4 header pins, so that I can easily connect and disconnect wire cables to my Sonoff device.

Preparing 3.3V FTDI Programmer
You need an FTDI programmer to upload a new firmware to your Sonoff. Use the schematics provided as a reference.

Warning: uploading a custom firmware is irreversible and you’ll no longer be able to use the app eWeLink.
I’ve added a toggle switch in the power line, so that I can easily turn the Sonoff on and off to flash a new firmware without having to unplug the FTDI programmer.
I used hot glue to glue the ends of the wires together. This prevents you from making wrong connections between the FTDI programmer and the Sonoff in the future.

Boot your Sonoff in Flashing Mode
To flash a new firmware to your Sonoff, you have to boot your Sonoff in flashing mode. To do that, follow these next 4 steps:
1. Connect your 3.3V FTDI programmer to your computer
2. Hold down the Sonoff button

3. Toggle the switch to apply power to the Sonoff circuit

4. Then, you can release the Sonoff button
Now, your Sonoff should be in flashing mode and you can upload a new firmware.
ESP Easy Firmware
The ESP Easy is a firmware that can be used in any ESP module, whether it is an ESP-01, ESP8266-12E, ESP32, and so on – read their Wiki page. This firmware provides an easy way to configure your ESP module – you don’t have to write any code.
After loading the firmware, all the configurations, like setting GPIOs as inputs, outputs, etc are done in your browser using a user-friendly graphical interface.

Flashing the Sonoff with ESP Easy Firmware on a Windows PC
Go to the ESP Easy firmware GitHub releases page and click the link ESPEasy_v2.0-xxxxxxxx.zip to download it:

After downloading, unzip the folder and run the FlashESP8266.exe file:

Select COM-Port (your FTDI’s programmer port) and choose the firmware that ends with 1024_DOUT.bin: ESP_Easy_v2.0-xxxxxxxx_normal_ESP8266_1024_DOUT.bin

Note: to flash the firmware on other operating systems, you can use the ESPTool.py to flash the firmware to your ESP8266. You can read more information about that subject here.
Troubleshooting
If you try to upload the sketch and it fails to flash, it means that your Sonoff is not in flashing mode. You’ll need to repeat the process described in the earlier section “Boot your Sonoff in flashing mode” in this guide and try to flash again.
Final circuit
After uploading the code, re-assemble your Sonoff. Be very careful with the mains voltage connections. It’s the exact same procedure as shown in the introductory guide.

If your house has a Earth connection, you should wire your Sonoff as follows:

Connecting to Your Wi-Fi Network
After powering your Sonoff device, you need to use your computer/laptop to connect to the ESP_Easy_0 Access Point (AP). In this case, I’m using my smartphone, so tap to connect to the ESP_Easy_0.

Type the password configesp and press the “CONNECT” button.

Then, open your browser and type the following IP address: 192.168.4.1 or simply tap “SIGN IN” button.

Configuring the WiFi page
You’ll be redirected to a web page at 192.168.4.1 that allows you to configure your ESP’s/Sonoff’s WiFi credentials. Select your network name, type the password and press the “Connect” button.

After a few seconds, it should print a message with your ESP’s IP address. In my case, it’s 192.168.1.113. Save that number, because you’ll need it in the next step.

Preparing the ESP Easy firmware
When you first access your the ESP Easy firmware web interface at your IP address (in my case: 192.168.1.113), you’ll be asked to enter a password (the default password is configesp).
After login, you’ll be redirected to the main page that contains different details about the device, as shown below.

Config
I strongly recommend going to the Config tab and type a new admin password (this will overwrite the configesp password). So, make sure you put down the new password, otherwise you’ll no longer be able to access the ESP Easy configurations web page.

Controllers
By default, it comes with the protocol Domoticz HTTP enabled. Remove it by clicking the “Edit” button.

Set the Protocol to “Standalone” and click the “Submit” button.

The figure below shows how the Controllers tab should look like after that step.

Hardware
The ESP Easy firmware allows you to set the Sonoff’s built-in LED as a Wi-Fi status LED. To do that, in the “Hardware” tab, go to “GPIO->LED” and set it to GPIO-13 (D7), which is the Sonoff’s built-in LED.

Devices
In the Devices tab, you should create a switch button that is assigned to the GPIO 12. You use GPIO 12 because that’s the ESP8266 GPIO the relay inside the Sonoff device is connected to. Press the “Edit” button.

Select as your Device “Switch input – Switch”.

Follow these configurations:
- Name your device
- Tick the Enabled box
- 1st GPIO: GPIO-12 (D6)
- Switch Type: Switch
- Switch Button Type: Normal Switch
After completing all the configurations, press the “Submit” button:

The figure below shows how your Devices tab should look like after this previous configuration.

Rebooting your Sonoff
For all the configuration to take effect, you should reboot your Sonoff. Go to the Tools tab and press the “Reboot” button.

Testing Your Sonoff Installation
Follow the next steps to test your Sonoff installation.
Open your browser and go to this URL to turn on your Sonoff: http://[your_sonoff_ip_address]/control?cmd=GPIO,12,1

Then, go to the next URL to turn off your Sonoff: http://[your_sonoff_ip_address]/control?cmd=GPIO,12,0

Creating the Node-RED Flow
Before creating the flow, make sure you have the Dashboard nodes installed. Then, you can either import the Node-RED flow or create it by yourself.
Importing the Node-RED flow
If you don’t want to create the Node-RED flow, you can import it. For that, go to the GitHub repository or click the figure below to see the raw file, and copy the code provided.

Next, in the Node-RED window, at the top right corner, select the menu, and go to Import > Clipboard.

Then, paste the code provided and click Import.

Then, you should change the HTTP request nodes to include your Sonoff’s IP address.

Creating the Node-RED Flow
If you prefer to create the Node-RED flow yourself, instead of importing the code, follow these next steps.
Drag the following four nodes:
- Dashboard switch
- Function switch
- HTTP request – on command
- HTTP request – off command

Then, edit the nodes as shown in the figures below.
1. Dashboard switch node:

2. Function switch node:
3. HTTP request – on command (you must replace with your Sonoff’s IP address).

4. HTTP request – off command (you must replace with your Sonoff’s IP address).
After editing all the nodes, wire your flow as shown below.

Finally, deploy your application
![]()
Demonstration
Congratulations! You project is now completed. Go to http://your-pi-ip-address/ui to control the Sonoff with the Node-RED Dashboard.

You can access your application in any browser in your local network to control your devices on and off.

Wrapping Up
In this project we’ve shown how to control your Sonoff with the ESP Easy firmware. As an example, we’ve used Node-RED, but you can integrate it with most home automation platforms.
We hope you’ve found this project useful. If you liked this post, you may also like:
- Build a Home Automation System
- Home Automation using ESP8266
- Build an All-in-One ESP32 Weather Station Shield
- ESP8266 Wi-Fi Button – DIY Amazon Dash Button Clone
- ESP8266 Daily Task – Publish Temperature Readings to ThingSpeak
Thanks for reading.


After one of your previous articles using the Sonoff products.
I bought some switches and outlets.
They do not work and no support from them.
They work for a day but most likely not the next day.
And certainly not a week later.
They have to be used often.
They lose their wifi connections and cannot reestablish automatically.
You have to go through the setup connection process every day.
To bad they work great the day you set them up.
Ralph
I use these devices now for 6 months and my experience is they work just fine. The only disadvantage is they are not quit sensitive, so the distance between router and SONOFF can not be very long.
Exactly what Jelle said. I’ve been using multiple Sonoffs and they are very reliable.
If they are too far from your router and you have a week connection they will disconnect, but that will happen with any Wi-Fi device. You might need to use Wireless booster to cover your area.
Depending on the software that you’re running in the Sonoff, you can write software that tires to re-connect upon loosing the Wi-Fi connection… No need for manual restarts.
All of my units are within 15′ of my wifi range expander, there is a strong signal. When they first connect there are always five bars but when I come back the next day there is only one bar at the most showing the WiFi connection. I would need the source code for reconnect.
I am glad to hear they are working for you, I bought four switches and two outlets so I have a bit invested in this venture.
I wanted to follow your great clear instructions.
Ralph
First off, a really great tutorial explaining a complicated procedure and making it appear easy. When it comes to the Sonoff itself I’m afraid I agree with Ralph. I have found them to be really unreliable even when near my router. I have given up on them. The situation may be different in America where Sonoff may be using different servers but here in Europe I and many others have found them to be very unreliable. Of late they have been more reliable because I believe they upgraded some of the servers serving Europe but just yesterday all went offline because my broadband has been upgraded to 5GHz dual frequency and Sonoff doesn’t support that yet! The other point is this project effectively downgrades the Sonoff because you are only able to use it when connect to your home network. In addition you have to add a raspberry pi.You lose the ability to control it from anywhere in the world. A really great project would be to be able to connect the Sonoff to Rui’s homeautomationserver.com. How long will that server be there though? Alternatively instructions for binding the Sonoffs to Openhab or HomeAssistant would be great. I’d love to be able to do it but don’t have the skills.
Dermot – this does not use the Sonoff servers at all. When you flash EspEasy it communicates directly to your own wifi with nothing in between. I just put Node-Red on my windows computer and can control it that way – no other mqqt servers needed unless you want to – you can do both direct or via another server however you want.
The amount of knowledge you put in this tutorial will set us to a level far beyond one tutorial. It is a masterpiece. .
Hi all. I am using ESP_Easy_v2.0-20180316_normal_ESP8266_1024_DOUT.bin slightly later than the version above. It seems to flash ok but on power cycle I can’t see ESP_Easy_0 Access Point. Does anyone else have this problem?
Jules , I read on EspEasy forums about people having that problem – something about the way it was flashed but I believe they fixed that issue. I had no problem seeing the Esp Easy 0 on my computers wifi for setup . Give it a try again sometime.
So I got over my last problem. Turned out there could be something wrong with ESPEasy_v2.0-20180316. When I delved back to ESPEasy_v2.0-20180312 and tried it I got the Sonoff to act as an AP.
Thank you for your clear tutorial. It would be great if you could show us how to integrate Sonoff basic to Home Assistant.
Hi 🙂
Unfortunately, we don’t have any tutorial about that subject, yet.
We’ll add your suggestion to our list of future tutorials.
Another great tutorial except that I ran into a problem which I can’t seem to resolve. Everything went fine up to the Easy ESP installation. ESP installed okay and I was able to access the ESP console and make the configuration changes. The config changes were made and properly saved in ESP and Sonoff rebooted. However when I tried to control the Sonoff using the http://192.168.0.69/control?cmd=GPIO,12,1 (my IP address) there is no response. I have reviewed the ESP configuration many times and doesn’t seem to have any errors. Did anyone else experience this ?
Try to leave the Arduino IDE serial monitor and see if it prints any error message that can help you figure out what’s going on
Hi, I am using a Sonoff POW R2. I managed to set the device into flash mode and flashed Easy ESP. But when I try to switch on the device, my phone/laptop won’t detect the wifi name.
I’ve flashed several times and changed my main power inlet to the device but nothing works. Any advice would help 🙁
Hi Adam.
I’m not familiar with Sonoff POW R2 and without further information, it is difficult to understand what is going on.
If anyone has the same problem and knows the solution, please share!
I’m sorry that I can’t help much.
Regards,
Sara
After installing ESPEasy on your sonoff S20, if you setup port forwarding correctly on your router, you can control your switch locally or remotely using the free (and ad free) Android app named ESPEasy Switch Controller found on apkfiles.com.
Thanks for the tip.
Regards,
Sara