Learn how to install the ESP-IDF extension for ESP32 boards on VS Code IDE (Microsoft Visual Studio Code) on Windows, Mac OS X or Linux Ubuntu operating systems.

Introduction to ESP-IDF (Espressif IoT Development Framework)
ESP-IDF, Espressif IoT Development Framework, is the original framework developed by Espressif (the developer of ESP32 chips) to program the ESP32. It is an SDK to develop applications for ESP32 chips using C and C++ programming languages that gives you low-level access to the hardware.

Being the “official” way to program the ESP32, it means the SDK is frequently updated to support the release of newer versions of ESP32 chips. On the other hand, it may take a while for new chips to be supported in the Arduino IDE. The following table shows the current supported ESP32 SoC series by ESP-IDF:
- ESP32
- ESP32-S2, ESP32-S3
- ESP32-C2, ESP32-C3, ESP32-C5, ESP32-C6, ESP32-C61
- ESP32-H2
- ESP32-P4
In order to program the ESP32 board using ESP-IDF, we recommend using VS Code IDE with the ESP-IDF extension and that’s what you are going to install on this guide.
Installing VS Code IDE
Follow the next instructions to install VS Code on your Operating System:
A) Installing VS Code on Windows (Visual Studio Code)
Go to code.visualstudio.com and download the stable build for your operating system (Windows).

Click on the installation wizard to start the installation and follow all the steps to complete the installation. Accept the agreement and press the Next button.

Select the following options and click Next.

Press the Install button.

Finally, click Finish to finish the installation.

Open VS Code, and you’ll be greeted by a Welcome tab with the released notes of the newest version.

That’s it. Visual Studio Code was successfully installed.
B) Installing VS Code on Mac OS X (Visual Studio Code)
Go to code.visualstudio.com and download the stable build for your operating system (Mac OS X).

After downloading the Visual Studio Code application file, you’ll be prompted with the following message. Press the “Open” button.

Or open your Downloads folder and open Visual Studio Code.

After that, you’ll be greeted by a Welcome tab with the released notes of the newest version.

That’s it. Visual Studio Code was successfully installed.
C) Installing VS Code on Linux Ubuntu (Visual Studio Code)
Go to code.visualstudio.com and download the stable build for your operating system (Linux Ubuntu).

Save the installation file:

To install it, open a Terminal window, navigate to your Downloads folder and run the following command to install VS Code.
$ cd Downloads
~/Downloads $ sudo apt install ./code_1.49.1-1600299189_amd64.deb
When the installation is finished, VS Code should be available in your applications menu.

Open VS Code, and you’ll be greeted by a Welcome tab with the released notes of the newest version.

That’s it. Visual Studio Code was successfully installed.
Installing Python
To program the ESP32 with ESP-IDF, you need Python 3.14.X or a latest version installed on your computer. Follow the instructions according to your operating system:
- A) Installing Python on Windows
- B) Installing Python on Mac OS X
- C) Installing Python on Ubuntu Linux
A) Installing Python on Windows
Go to python.org/downloads and download Python 3.14.X or a latest version.

Open the downloaded file to start the Python installation wizard. The following windows show up.
Important: make sure you check the option Add Python to PATH. Then, you can click on the Install Now button. You may also need to check the “Use admin privileges when installing py.exe”.

If the installation is successful, you’ll get the following message.

Finally, click the Close button.
B) Installing Python on Mac OS X
Open a Terminal window. You can open it through Spotlight Search. To launch Spotlight, click the small magnifying glass icon in your menu bar (or press Cmd+Space).

Then, type “terminal” and click on the Terminal icon to launch it.

To install Python, I’ll be using Homebrew. If you don’t have the brew command available, type the next command in the Terminal window:
/bin/bash -c "$(curl -fsSL https://raw.githubusercontent.com/Homebrew/install/master/install.sh)"Here’s how it looks on the Terminal window:

Then, run the brew command to install Python 3.14.X:
brew install python3Here’s how it looks on the Terminal window:

C) Installing Python on Linux Ubuntu
To program the ESP32 boards with ESP-IDF, you need Python 3.14.X or a latest version installed on your computer.
Open the Terminal window and check that you already have Python 3 installed. Run the following command:
python3 --versionIt should return the current installed version:
python 3.14.XIf you don’t have Python installed, run the next command to install it:
sudo apt install python3Whether you already have Python installed or not, you need to run the following command to install Python utilities.
sudo apt install python3-distutils
Installing the ESP-IDF Extension for VS Code
Next, follow these instructions to configure the ESP-IDF Extension:
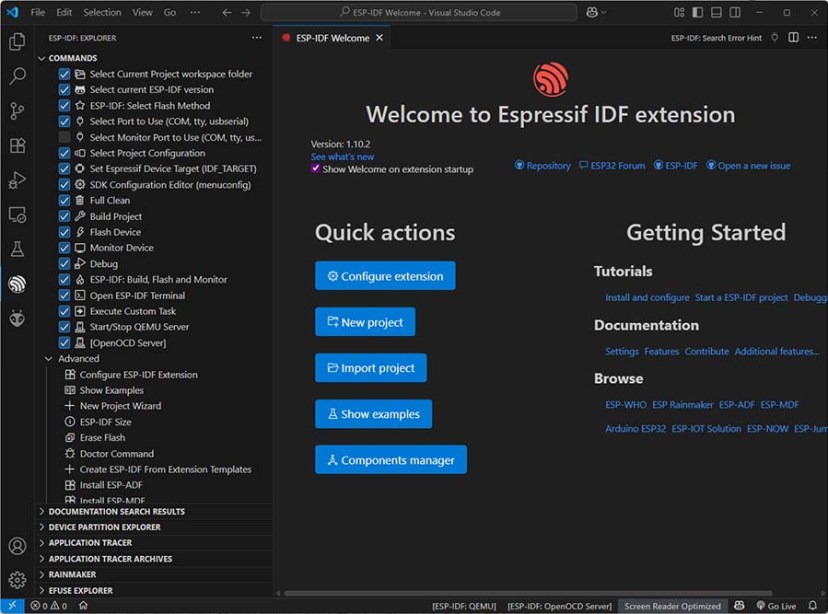
- Open the ESP-IDF Espressif extension panel and expand the “Advanced” menu
- Click the “Open ESP-IDF Installation Manager” option
- Select the “Github” mirror to use
- Press the “ESP-IDF: Open ESP-IDF Installation Manager” software to configure the ESP-IDF Tools

A new software window will open with the ESP-IDF Installation Manager, click “Start Installation“.

If you see a message saying that prerequisites are missing, you can install them automatically.

After that, you can use the “Easy Installation” wizard, which only allows you to select the ESP-IDF version. For this guide, we’ll use the “Custom Installation” wizard, so we can walk you through all the available options.

If for some reason you still have an old version of Python running, you can install the compatible Python version directly from the ESP-IDF Installation Manager.

I recommend selecting the “All” option to install all the ESP32 chip variations.

During the ESP-IDF Express Setup screen, you’ll be prompted to select the ESP-IDF version. At the time of writing this guide, the latest released version is v6.0.2. We recommend using version 6.X to follow along.

You can use the default download mirrors URLs and click “Continue“.

For most users, we recommend only selecting the “core” packages for ESP-IDF.

We’ll also only select the default required tools, then click “Continue“.

Select the installation directory path using the “Browse” button, then continue the installation wizard.

Now that all the options have been selected, you can start the installation process.

Depending on your internet connection speed and computer hardware, the installation process can take more than 1 hour to complete. You need to be patient and let the installation process continue.
Once it’s ready, you’ll see a similar message as illustrated in the screenshot below. You can click the “Exit Installer” button to close it.

That’s it, your ESP-IDF installation was completed.
Installing the C/C++ Extensions for VS Code (optional)
This step is optional, but since you’ll be using the C++ language with the ESP-IDF framework to program the ESP32 boards, we recommend installing these C/C++ extensions for VS Code. Open VS Code and click on the Extensions icon to open the Extensions tab.
Search for “C/C++“, select the first option and click the Install button.

You can also install the “C/C++ Extension Pack“.

Programming ESP32 with ESP-IDF using VS Code
That’s it, your ESP-IDF extension has been installed. You can get started programming your ESP32 boards with your first Blink project by following our guide ESP-IDF: ESP32 Blink LED Example.
Wrapping Up
In this tutorial, you learned how to install the ESP-IDF extension on VS Code. You can now program your ESP32 board using ESP-IDF.
Here are some ESP-IDF tutorials that you may find helpful:
- Programming ESP32 with ESP-IDF using VS Code – Getting Started Guide
- ESP-IDF: ESP32 Blink LED Example (VS Code)
- ESP-IDF: ESP32 GPIO – Control Digital Outputs
You can check our ESP32 resources (with Arduino IDE) to learn more about the ESP32 board:
Thanks for reading.


Trouble finding the ESP-IDF Extension in Visual Studio.
When I type in ESP-IDF in Visual Studio, it comes up with nothing (it just displays ‘Loading’). If I backspace until only ESP is being searched for, it does find the Arduino IDE for Visual Studio 2022, which is a trial only version from Visual Micro and not the one from Espressif.
Visual Studio is the standard Community 64n bit version 17.14.2.
Any help would be gratefully received.
Hi.
It is not necessary to make any extra steps for the plugin to show up.
It is in the extensions repository.
Are you using Visual Studio instead of Visual Studio Code?
You need Visual Studio Code which is different from Visual Studio.
Visual Studio Code is free.
Regards,
Sara
I am am using Visual Studio (Community Edition) which is also free, and I need to use that for other projects I am involved in. Is it possible to run the two options on the same computer? By that I mean if i download and install Visual Studio Code will it interfere with Visual Studio and vice versa?
Hi.
Those are two completely different softwares.
One shouldn’t interfere with the other.
Regards,
Sara
Okay, I will give it a try a bit later and report the result. Fingers crossed!
For anybody (like me) who wants confirmation that installing Visual Studio Code on a PC running Visual Studio Community Edition, I can say that the two installations, on a Windows 11 computer, worked as hoped for. I could run a Visual Studio program whilst I had Code running at the same time.
I ran into another problem when configuring the Extension (ERROR_INVALID_PIP) but as this looks to be a python problem, will be exploring this in another forum.
The ERROR_INVALID_PIP problem was easy to solve; I just googled it and the first hit was to delete a couple of folders in the \Espressif\tools folder (or wherever you chose to install), idf-git and idf-python, then re-ran the installation routine and the Configure ESP-IDF Extension; all was fine after that and the blink routine works correctly, although I can see it will take me a while to get my head around all that is involved using Visual Studio Code 🙁
The link is esp32.com/viewtopic.php?t=23976
They do not interfere, because they are two completely different things.